

A remote control significantly enhances the convenience of operating your Harbor Breeze ceiling fan, allowing easy adjustments to speed and lighting from anywhere in the room. However, original remotes can get lost, damaged by pets or accidents, or simply fail over time. Furthermore, many homeowners with older pull-chain operated Harbor Breeze fans desire the modern convenience of remote operation.
While finding an exact replacement remote for a specific (especially older or discontinued) Harbor Breeze model can be difficult due to their nature as a Lowe’s store brand with limited long-term parts support, universal ceiling fan remote control kits offer a readily available and effective solution. These kits typically include both a new handheld remote transmitter and a matching receiver unit that gets installed inside the fan’s canopy.

This comprehensive guide provides everything you need to know about using universal remotes with Harbor Breeze fans. We’ll cover:
- Why universal remotes are often necessary?
- Crucial compatibility factors to check BEFORE buying a kit.
- Where to purchase suitable kits in the US market.
- Detailed step-by-step universal remote installation instructions (including the receiver).
- Clear universal remote programming instructions for both common types (DIP switch and Learn button).
- Basic usage tips.
Understanding compatibility and following the correct installation and programming steps are key to successfully adding or restoring remote functionality to your Harbor Breeze fan. Safety First: Always turn off power to the fan circuit at the main breaker box and verify with a voltage tester before opening the fan canopy or handling any wiring.
Why Opt for a Universal Remote with Harbor Breeze Fans?
For owners of Harbor Breeze ceiling fans, especially models that are several years old or no longer sold at Lowe’s, finding an identical replacement for a lost or malfunctioning original remote is often challenging, if not impossible. Lowe’s typically does not stock extensive replacement parts for discontinued store-brand models.
This is where universal remote control kits become invaluable. They are designed to work with a wide range of fan brands and models (within certain technical parameters) and offer several advantages:
- Availability: Universal kits are widely sold by numerous manufacturers through major retailers (Lowe’s, Home Depot, Amazon.com, eBay) and fan parts specialists.
- Solution for Lost/Broken Remotes: Provides a direct replacement path when the original is gone.
- Upgrade for Pull-Chain Fans: Allows adding remote functionality to basic fans originally operated only by pull chains.
- Guaranteed Pairing (with Kits): Purchasing a kit containing both a remote and a matching receiver ensures the two components are designed to communicate correctly, bypassing potential incompatibility issues with an existing (possibly unknown or faulty) receiver.
CRITICAL: Understanding Universal Remote Compatibility Factors
Not all universal remotes work with all fans. Choosing an incompatible kit will lead to frustration. Before purchasing any universal remote kit for your Harbor Breeze fan, verify these critical factors:
- Kit vs. Remote-Only (Recommendation: Buy a KIT):
- Remote+Receiver Kit: This is strongly recommended. It includes a new remote AND a new receiver unit. You install the new receiver in your fan’s canopy, replacing the old one if present. This guarantees the remote and receiver can communicate.
- Remote-Only Purchase: Buying just a universal remote handheld unit is risky unless you are certain it’s an exact replacement model number OR explicitly designed to work with the specific receiver already installed in your fan. Remote-only replacements must match the existing receiver’s operating frequency AND communication protocol (DIP switch settings or specific Learn function). It’s very difficult to guarantee this match for older/unknown Harbor Breeze receivers. Stick with purchasing a matched kit.
- AC vs. DC Motor Compatibility: This is crucial!
- AC Motors: The vast majority of Harbor Breeze fans use standard AC (Alternating Current) motors. Most common universal remote kits are designed specifically for AC motor fans.
- DC Motors: Some newer, high-efficiency Harbor Breeze models might use DC (Direct Current) motors. These require specific DC motor compatible remote kits.
- How to Check: Consult your fan’s manual if possible. DC motor fans often come standard with remotes that have more speeds (5-6) and a remote reverse function. AC fans typically have 3 speeds and a manual reverse switch on the housing. Using an AC remote kit on a DC fan (or vice-versa) WILL NOT WORK and could potentially damage the fan or control. Ensure the kit explicitly states compatibility with AC (or DC) motors.
- Light Kit & Dimming Support:
- Does your fan have a light kit you want to control? Choose a kit with dedicated light control buttons (On/Off).
- Do you want to dim the lights? Choose a kit that explicitly mentions dimming functionality. Remember, dimming also requires dimmable bulbs to be installed in the fan. The kit’s receiver must contain the dimming circuitry.
- Receiver Physical Size & Fit:
- The receiver unit included in the kit needs to physically fit inside your fan’s ceiling canopy along with the wiring and mounting bracket. Measure the available space in your canopy (especially height/width) before buying. Check the dimensions of the receiver unit listed in the kit’s specifications. Fit can be especially tight in low-profile or hugger-style fans.
- Number of Fan Speeds: Most universal kits for AC fans support 3 speeds (Low, Medium, High), which matches standard Harbor Breeze AC fans. Kits for DC fans often support 5 or 6 speeds. Ensure the kit matches your fan’s capabilities.
- Extra Features: Some universal kits offer additional functions like timers (auto-off after set time), walk-away light delay (light stays on briefly after turning off), or variable breeze modes. Consider if these are desired.
Where to Buy Compatible Universal Remote Kits

Once you know the features you need (AC motor, light/dimming support, etc.), you can find compatible universal kits at:
- Lowe’s & Home Depot: Both carry universal remote kits from various brands (including potentially Harbor Breeze or compatible store brands like Hampton Bay, Hunter) in their fan accessories sections. Staff may offer limited compatibility advice.
- Amazon.com / eBay.com: Offers the widest selection from numerous manufacturers (common kit brands include subsidiaries of Litex, Westinghouse, and many others, often marketed as replacements for models like FAN-53T, FAN-28R, etc.). Read product descriptions and specifications extremely carefully, paying attention to AC/DC compatibility, light/dimming support, receiver dimensions, and user reviews mentioning Harbor Breeze compatibility. Here are our recommendations.
- Specialized Online Fan Parts Retailers: Websites focusing on ceiling fan parts often provide good quality universal kits and sometimes better compatibility information or support.
- Key Advice: Prioritize kits explicitly stating AC motor compatibility (unless you know you have DC). Carefully verify light/dimming features match your needs. Check receiver dimensions. Read reviews for compatibility experiences. Ensure the seller has a reasonable return policy in case you encounter unexpected incompatibility.
Harbor Breeze Universal Remote Installation: Step-by-Step Guide
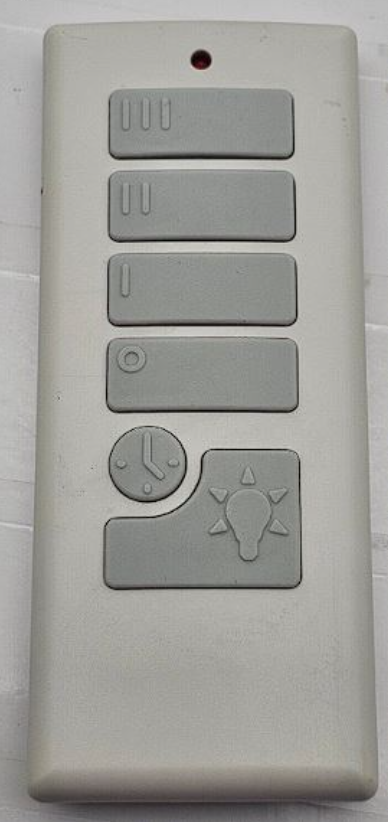
This guide assumes you purchased a universal remote control kit containing both a new remote and a new receiver unit.
Safety First – ALWAYS:
- Cut Power: Turn OFF the circuit breaker controlling the fan at your main electrical panel.
- Verify Power Off: Use a non-contact voltage tester at the ceiling box and wall switch to confirm power is OFF.
- Ladder Safety: Use a stable ladder correctly positioned.
Tools Needed: Phillips head screwdriver, wire strippers, wire nuts (use new ones included with kit if possible), voltage tester, electrical tape (optional), ladder, safety glasses.
Steps:
- Prepare the Fan:
- If converting a pull-chain fan: Use the chains to set the fan speed to HIGH and the light kit ON. This ensures the receiver gets full power to distribute. Leave chains in these positions permanently.
- If replacing an existing remote system: Proceed to access the canopy.
- Access Canopy & Remove Old Receiver (If Present):
- Loosen and remove the fan’s canopy screws. Carefully slide the canopy down the downrod to expose the mounting bracket, wiring, and the existing receiver unit (if applicable).
- Document Wiring: Before disconnecting anything, take clear photos or draw a diagram of how the existing receiver (or the fan wires, if no receiver) connects to the house wiring and the fan wires. Note wire colors and connections carefully.
- Disconnect Wires: (Power Verified OFF!) Unscrew wire nuts connecting the old receiver (or fan wires) to the house wiring and the fan/light wires.
- Remove Old Receiver: Physically remove the old receiver unit from the mounting bracket/canopy area.
- Position NEW Receiver:
- Find the best orientation for the new receiver unit to fit within the mounting bracket or canopy space without being pinched. Ensure it doesn’t obstruct the hanger ball movement (if downrod mount).
- Position the receiver’s antenna wire according to the kit’s instructions (often hanging freely down slightly outside the bracket for best reception).
- Wire the NEW Receiver:Follow the specific wiring diagram included with YOUR universal remote kit PRECISELY. While colors are often standard, always trust the kit’s diagram and wire labels. A typical connection for an AC fan kit is:
- Grounds: Connect the Green wire from the ceiling box, Green from mounting bracket, Green from fan motor, AND Green (if present) from the receiver all together using a wire nut.
- Receiver INPUT:
- Connect the Neutral wire (White) from the ceiling box to the Receiver’s AC INPUT N wire (usually White).
- Connect the Hot wire (Black) from the ceiling box to the Receiver’s AC INPUT L wire (usually Black).
- Receiver OUTPUT:
- Connect the Receiver’s OUTPUT to Motor N wire (usually White) to the Fan’s Motor Neutral wire (White) AND the Fan’s Light Kit Neutral wire (White).
- Connect the Receiver’s OUTPUT to Motor L wire (usually Black) to the Fan’s Motor Hot wire (Black).
- Connect the Receiver’s OUTPUT for Light wire (usually Blue) to the Fan’s Light Kit Hot wire (often Blue, sometimes Black).
- Secure Connections: Use appropriately sized wire nuts for all connections, ensuring they are twisted on tightly with no bare copper exposed. Gently tug each wire to confirm security. Optional: Wrap connections with electrical tape.
- Secure Receiver & Reattach Canopy:
- Carefully tuck the wired receiver unit into its designated space in the mounting bracket/canopy.
- Neatly arrange all wires and wire nuts up into the ceiling outlet box, preventing pinching.
- Slide the canopy back up flush against the ceiling and secure it firmly with its screws.
- Prepare the Remote: Install fresh batteries of the correct type into the new handheld remote transmitter, noting polarity.
Programming Your Harbor Breeze Universal Remote (DIP Switch & Learn Button Methods)
With the receiver installed and batteries in the remote, the final step is programming or syncing them to communicate. Check your kit’s instructions to determine which method it uses:
Method 1: Programming Universal Kits with DIP Switches
- Concept: These kits have identical blocks of small physical switches inside the remote (battery compartment) and on the receiver unit. You must set both blocks to the exact same pattern (code) to establish communication.
- Steps:
- Choose Code BEFORE Closing Canopy: While the receiver is still accessible (or if you need to change code later, Power OFF and lower canopy), decide on a unique code pattern for the DIP switches (e.g., 1-UP, 2-DOWN, 3-UP, 4-DOWN). Avoid the default setting (all OFF or all ON) to prevent interference.
- Set Receiver Switches: Using a small tool (pen tip, small screwdriver), carefully slide the switches on the RECEIVER unit to match your chosen pattern.
- Set Remote Switches: Open the remote’s battery compartment. Slide the DIP switches inside the REMOTE to exactly match the pattern you set on the receiver.
- Install Batteries/Reassemble: Install batteries in the remote. Ensure receiver is correctly wired and securely positioned in the canopy. Reattach the canopy.
- Restore Power & Test: Turn the circuit breaker ON. The remote should now operate the fan immediately. Test all functions.
- Troubleshooting: Double-check the switch patterns match 100%. Ensure batteries are good. Verify receiver wiring. If interference occurs (controlling neighbor’s fan), choose a different unique DIP code pattern and set it on both units again.
Method 2: Pairing Universal Kits with a Learn/Pair Button
- Concept: Common on newer kits. An electronic pairing process links the remote and receiver after power is cycled. No physical switches to match.
- Steps:
- Ensure Installation Complete: Receiver wired and secured in canopy, canopy attached, batteries installed in remote.
- Locate Learn Method (Check Kit Manual!): Find the pairing button/sequence for your specific universal remote. Is it a “Learn” button inside the battery compartment? A combination press like “Fan Off + High Speed”? Note the action (press vs. hold) and timing window.
- Power OFF Fan Circuit: Turn breaker OFF for 15-30 seconds.
- Power ON Fan Circuit.
- Initiate Pairing IMMEDIATELY: Within the specified time window (often 30-60 seconds – check manual!), perform the required pairing action on the remote (press/hold the learn button or button combo).
- Observe Confirmation: Look for a beep from the receiver or a flash from the fan’s lights to confirm pairing was successful (refer to kit manual).
- Test Functions: Test all remote buttons thoroughly.
- Troubleshooting: Timing is critical – repeat power cycle if missed. Verify correct button/action from manual. Use fresh batteries. Double-check receiver wiring if no response at all.
Using Your Universal Remote Control
Once installed and programmed/synced, your universal remote should operate similarly to an original remote. Common buttons include:
- Fan Speed Buttons (Low, Medium, High)
- Fan Off Button
- Light On/Off Button
- Light Dimmer (often requires pressing and holding the light button, only works with dimmable bulbs) Note that most universal kits for AC fans do not control the reverse function; you will still need to use the manual switch on the fan’s motor housing to change blade direction seasonally.
Conclusion: Universal Remotes – A Smart Solution for Harbor Breeze Fans
Universal remote control kits provide a widely available and practical solution for replacing lost or broken Harbor Breeze remotes, or for adding remote convenience to pull-chain operated fans, especially given the difficulty sourcing official OEM parts for older or discontinued models.
Success hinges on careful compatibility verification before purchase. Ensure the kit matches your fan’s motor type (AC vs. DC), supports needed features like lighting and dimming, and that the receiver unit will physically fit in your fan’s canopy. Choosing a matched kit (remote + receiver) significantly increases the likelihood of successful operation compared to buying a remote alone.
Follow the installation and programming instructions provided with your specific universal kit meticulously, always prioritizing electrical safety by working with the power turned off at the breaker. With the right compatible kit and careful setup, a universal remote can restore or add modern convenience to your Harbor Breeze ceiling fan.