How to Install Harbor Breeze Ceiling Fan
Heating and cooling can take almost half of your electricity bill. Do you know that? You can do a lot about it to minimize it. installation of ceiling fan in your space can save up to 40% on your power bill. The task is very easy. Once the installation is completed, you will use it along with your AC (or it can generate enough air to do the job alone). The ceiling fan can also be used with a furnace. Both of these actions can save more or less 40% cost of the power. The project is easy to do and should be done. Ceiling fan installation can be performed easily.
You will be able to learn about Harbor Breeze Ceiling Fan Installation. The first thing is to gather the tools and materials that you will need, here is the list:
- Pliers
- Ladder
- Screw driver
- Wire Connectors, Wire Strippers
- Electrical tape
- Circuit tester
- Ceiling Fan Kit
- Drill with driver and bit
- Safety Glasses
- A metal electric ceiling fan box may be required
Here is step by step video guide on how to install your new Harbor Breeze ceiling fan.
What size Harbor Breeze Ceiling Fan Do I Need to Install?
So, what size of Harbor Breeze ceiling fan should I get for my home? If your room in which you are going to install it contains a longest wall of 12 feet or less, a 36-inch fan or smaller will be ideal. If the longest wall is of 12-15 ft in size, a 42-48 inch fan is recommended. Lastly, if the longest wall is over 15 ft, a 52-inch or larger unit should be considered.
Read the instructions before you begin the installation. You need a permit for installation keeping in view the local building codes. Ensure that you should conduct a proper research first.
Now, you can start Harbor Breeze Ceiling Fan Installation, make sure to switch off the power on the main breaker. Use a wire tester to ensure that there is no hot lead, in short, check the electricity to make sure they are not still in the line.
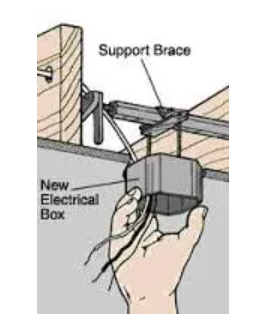
Once you have shut down the power, remove the existing unit from the ceiling. If the current box that the fixture is installed on is plastic, you will have to get a steel box to replace it. If the steel box is not properly fastened, you may also have to get an expandable mounting bracket.

Here are the steps for Mounting and Installation for Harbor Breeze Ceiling Fans
- Use the mounting screws to secure the bracket to the ceiling electrical box.
- The next thing to do is assemble the fan.
- Now, pull the wires down through the canopy, downrod and other trim.
- Install the downrod into the housing.
- Use the connector pin and counter pin to secure the rod to the housing
- Fastened the set screw on the side of the downrod.
- Lift the assembled unit to reach the mounting bracket. You may need an extra person to help you here.
You may need assistance when holding the ceiling fan to the ceiling and tighten it.
- Make a connection between the white neutral and green ground wire to the same color wire in the ceiling box to connect them.
- If your fan contains a lighting fixture, attach both remaining wires to the remaining hot wires in the box.
- Use the electrical tape to Secure the wire connectors.
- Push the wires into the electrical box.
- Seat the canopy and use the screws to secure it.
- After securing the motor, use the screws and washers to mount the fan blades that came in the package.
- Follow the instructions to install the light kit.
